Transfer the design onto the fabric
- Ajda Zorko

- Mar 23, 2023
- 4 min read
Transfer the design onto the fabric - how and what to use
Before starting embroidery, we usually transfer the design onto the fabric we want to embroider. If we do not want to do this, we can resort to:
- pre-printed embroidery motifs (available at some sewing supply stores)
- water-soluble stickers for embroidery (which we print or have a ready-made design)
- we follow the stitches/print/design that is already present on the selected fabric or garment
There are several ways to transfer from paper to fabric. The choice of method itself depends mainly on the complexity/fragmentation of the design and the selected location (whether we are embroidering on fabric stretched into a hoop or on a finished item, e.g. footwear, bag). The methods described here are most suitable for different types of fabric that are stretched on a frame or hoop. Remember, when you intend to embroider a hard-to-reach place of clothing, you can use the method of preparing embroidery on fabric of a similar color and then sewing the embroidery onto the garment in the form of an appliqué.
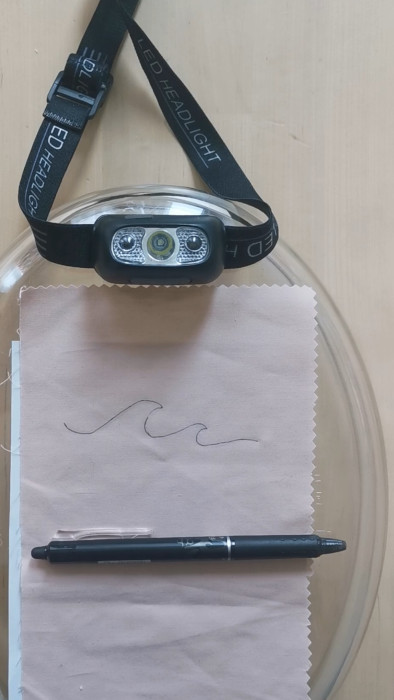
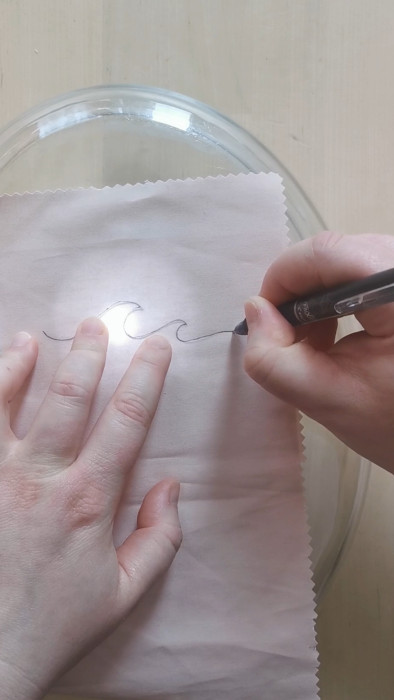
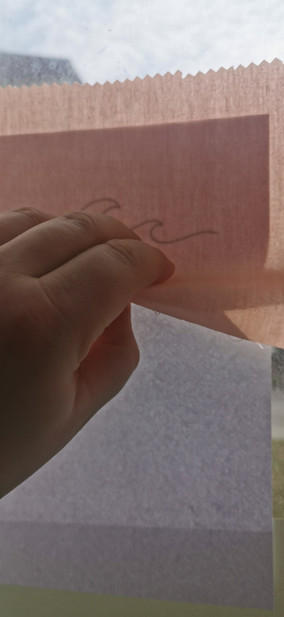
The design can be copied using a window and sunlight, a tablet computer, or, if you have a glass baking dish, place a lamp/phone under the dish and use the glass to copy. The light source method works best on light/thinner materials. If you have dark or thicker fabric, other methods may be more suitable (sticker or tracing paper method/prick and pounce method - described below).
PEN
First, a little about pens. You can use them freehand and draw a design yourself, you can redraw using a light source (as mentioned before), you can draw with them on a sticker/paper, use thin paper that you tear away or use the prick and pounce method.
Pilot Frixion pens have a heat-sensitive pigment in the ink itself: it disappears under heat (ironing, blow-drying).
Warning: When transported through very cold areas, the markings may reappear.
Also: the disappearing ink component is only one of the components of this ink - other components may oxidize over time or start to react with finishes/dyes and other coatings on the selected goods (they may show over time)..
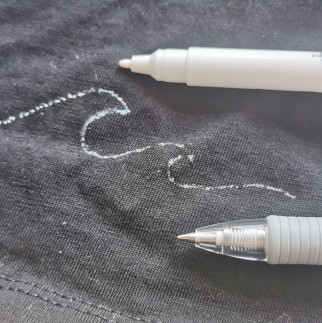
"White" markers/chalk markers are good for marking on dark bases. They are not completely covering, like, for example, pastel pencils, but they work well and, precisely because of the poorer visibility, they are easier to hide under the finished embroidery. Greasy pastel pencils work really well but are more difficult to wash off.
Water-soluble felt-tip pens are available in different colors. In my case, I'm testing blue. I have two such felt-tip pens, bought on different occasions. Both dissolve well when immersed in warm tap water, but one dissolves significantly more easily than the other. If you have children at home and want to save on sewing accessories, look for children's felt-tip markers. Children's markers are designed to be easily washable, making them ideal for projects you know will go into machine washing.
Silver/metallic ballpoint pens are available in many colors (not just silver) and work great for marking on dark colors (I borrowed this trick from my shoemaking days, as "silver lead" is used to draw on leather). Regarding washing, it is recommended to test in a hidden area or on a piece of scrap fabric.
COPY PAPERS
Indigo/graphite/copy paper is available at stationery stores, craft supply stores and sewing supply stores. Stationary copy paper is mainly available in blue, which transfers very well to fabric and leaves a strong, precise line. Older embroiderers have warned me that not all of these blue/indigo copy papers wash out, so it is essential to test the washability or completely cover the design. Graphite paper doesn't leave as intense a line and can smudge by touching/folding the fabric. Tailoring copy paper for dark colors is usually available in yellow or red. As with others, I recommend testing the washability and color runoff before starting the project.
For drawing with these copy papers, a dry ballpoint pen works best, or a knitting needle. Any pointed object will work as long as it doesn't make holes/tear the paper with the design.
PRICK AND POUNCE or TRACING PAPER METHOD
The prick and pounce is one of the older methods of transferring designs. Tracing paper or transparent plastic film can be used. Roughly speaking, it's about first tracing the motif onto the tracing paper. Then we take a thicker needle and make holes along the line of the motif (on the plastic or tracing paper). We place the perforated paper on the chosen place where we want to embroider. Then we use a pen to make dots through the holes. We check while making these dots, whether we are marking strongly enough. When the design is completely transferred, the tracing paper is removed and the drawing can be added onto by connecting the dots.
In Indian embroidery, foil is used and instead of a pen, a string dipped in a mixture of chalk and kerosene or alcohol. In the Middle Ages, the same technique was used to transfer the motif, and the pen was replaced by a bag of ground chalk that left dust.
This method is ideal for simpler, linear motifs. The perforated paper can be used several times, even reversed for a mirror image. We can use this method for dark or light bases. It is more difficult to convey fragmented designs, but this also depends above all on your dedication, patience and skill.
SUMMARY
In any chosen method, I recommend first testing how the ink with which we want to mark will react to water/rubbing/use of heat. Before you start drawing, think about how the item will be used (will it hang on the wall for years untouched or will it be washed every week). Think about what color the base is and what color the thread will be. Contrasting pen colors can be seen very well, but it would be a shame if the residue of the pen remained in the embroidery threads after washing.
Each embroiderer finds their own way and most suitable technique for transferring. Trying out different methods is the best way to learn which way is right for you!
If you enjoyed bit of reading, stop by my insta page (@ajda_embro_design) where you’ll get an idea for a gift, learn how to make a stitch or find some other useful embroidery information!
Ajda Zorko is a guest blogger. Her opinions do not necessarily reflect the opinions of Štikarca.










Comments